Dangerous Dog Ear Cleaning Mistakes

Cleaning your dog's ears incorrectly can lead to painful infections and injury.
Cleaning your dog's ears can cause serious harm if done incorrectly or at the wrong time. You should never clean an ear you suspect is infected, as this can worsen inflammation and pain. Using the wrong tools like cotton swabs or harsh solutions containing alcohol or hydrogen peroxide can damage the ear canal and eardrum, leading to nerve damage and balance problems.
As a dog owner, you want to do everything right for your furry friend. You research the perfect best dog subscription boxes for toys, you choose a fresh dog food diet, and you stay on top of their grooming routine. Ear cleaning often feels like a basic part of that responsible care. After a bath or a muddy adventure, it seems logical to give those floppy ears a quick clean. I've been there, reaching for the supplies with good intentions. But what if this routine act of love could accidentally hurt your dog?
The truth is, ear cleaning is not a universal task. It's a procedure that requires specific knowledge and timing. Done well, it's preventive care. Done poorly or at the wrong moment, it can turn a minor issue into a major, painful problem for your pup. This isn't about scaring you away from maintenance; it's about empowering you with the knowledge to know when to pick up the ear cleaner and, more importantly, when to put it down and call your vet.
Why Is Ear Cleaning Sometimes Dangerous?
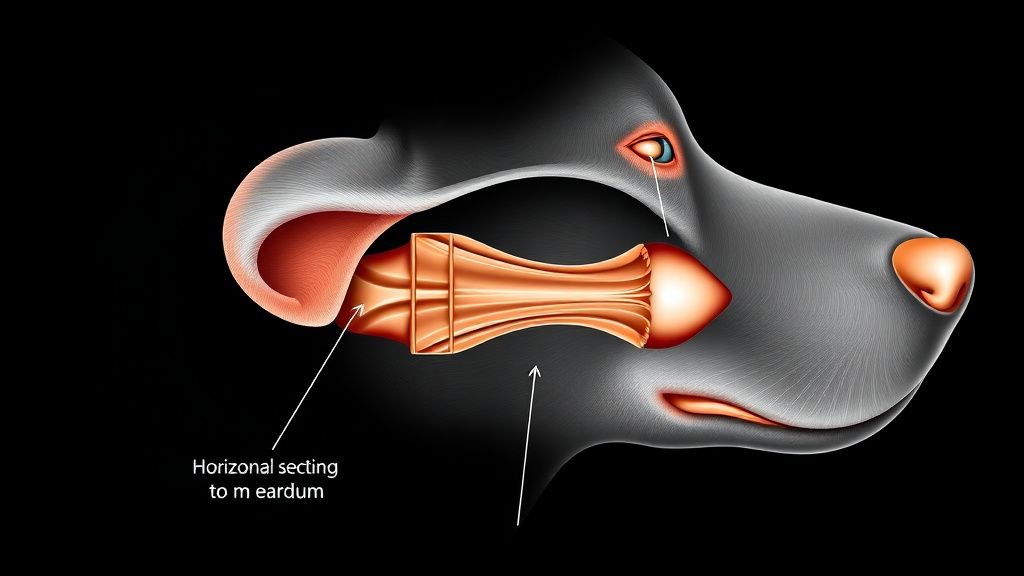
A dog's ear is a delicate, complex structure. Unlike our short, straight ear canals, a dog's ear canal plunges downward before making a sharp horizontal turn toward the eardrum. This classic L-shape is a design that unfortunately traps moisture, wax, and debris. It's a perfect environment for problems if not managed correctly, but it's also a structure that's easily damaged by well-meaning interference.
The primary dangers of cleaning come from three main mistakes: using harmful substances, applying physical force incorrectly, and cleaning when the ear's natural defenses are already compromised. For instance, the Walkerville Vet highlights a severe risk: cleaning when the eardrum is ruptured. They state, "Most cleaning solutions will cause nerve damage and balance problems if they enter the middle ear." This isn't a minor irritation. It's a potential for permanent harm that can occur silently if you don't know the eardrum is compromised.
Furthermore, the unique anatomy means that anything you put in the ear, from solution to a cotton swab tip, can get lodged deep inside. As noted by VCA Animal Hospitals, cleaners with alcohol or hydrogen peroxide can irritate and inflame the sensitive skin of the ear canal. This irritation breaks down the skin's natural barrier, making it easier for yeast and bacteria to set up shop and actually *cause* the infection you were trying to prevent.
When Should You Absolutely NOT Clean Your Dog's Ears?
This is the most critical section for every dog owner to understand. There are clear red flag situations where inserting anything into your dog's ear is the worst thing you can do. If you notice any of the following signs, stop. Do not clean. Call your veterinarian.
Signs of a Possible Ear InfectionIf your dog's ears look red, swollen, or inflamed, or if they have a persistent, unusual odor, you might think cleaning is the first step. It's a natural instinct. However, the American Kennel Club warns explicitly that "cleaning an already infected ear often causes more harm than good." Purina UK echoes this, stating that cleaning an infected ear "could cause them much more harm than good." Why? Because an infected ear canal is raw, ulcerated, and painful. Pouring liquid into it can be excruciating. More importantly, it can push debris and infectious material deeper toward the eardrum, worsen the inflammation, and make it harder for your vet to examine the ear properly and for prescribed medication to work.
Suspected Ruptured EardrumThis is a silent but serious contraindication. You may not know the eardrum is ruptured. Signs can include sudden loss of balance, head tilting, circling, vomiting, or a dog that seems uncoordinated. As the research from Walkerville Vet stresses, introducing cleaning solution into an ear with a ruptured drum allows that liquid to enter the middle and inner ear. This can lead to severe complications like ototoxicity, which is damage to the nerves responsible for hearing and balance. This damage can be permanent.
Excessive Pain or Head-Shy BehaviorIf your dog, who normally tolerates ear handling, suddenly yelps, pulls away violently, or tries to bite when you touch near their ears, they are in significant pain. Forcing a cleaning in this state is traumatic and will destroy their trust for future handling. Pain is a message. The message is: something is very wrong, and this needs professional diagnosis.
Deeply Impacted DebrisSometimes, you might peek in and see a solid plug of wax or debris far down the canal. As Cornell University's College of Veterinary Medicine explains, "If debris is packed deep into the ear canal, it can prevent the medication from reaching the deeper parts of the ear." Attempting to flush this out at home without the right tools and visibility can simply pack it in tighter, creating a blockage that traps moisture and infection against the eardrum. Your vet has the tools (like an otoscope to see clearly) and expertise to remove this safely.
What Are the Most Common Harmful Cleaning Mistakes?
Many dog owners accidentally cause ear problems by cleaning incorrectly. Knowing these common pitfalls can help you avoid them entirely.
Using the Wrong Cleaning SolutionsThis is a major culprit. Many household products and even some marketed pet products can be too harsh.
* Alcohol and Hydrogen Peroxide: VCA Animal Hospitals and Virbac both warn against these. Alcohol is extremely drying and causes a burning sensation on inflamed skin. Hydrogen peroxide, while a mild antiseptic, can irritate and damage the healthy skin cells lining the ear canal, delaying healing.
* Vinegar and Water Mixtures: While sometimes recommended, these can be problematic if the pH is wrong or if the ear drum is not intact. It's best to use a solution specifically formulated and pH-balanced for canine ears, recommended by your veterinarian.
Using Cotton Swabs (Q-Tips) or Other ObjectsThis might be the number one physical mistake. As noted by Advanced Pet Care Clinic, Q-Tips "can put too much pressure on the ear canal." Preventive Vet adds that they "can cause wax to be pushed down deeper, making it harder to remove." You cannot see around the L-shaped bend in your dog's ear. Using a swab is essentially pushing debris blindly into a corner, where it becomes impacted. You also risk accidentally puncturing the eardrum. The outside of the ear flap (pinna) can be gently wiped with a cotton ball, but nothing should go into the vertical ear canal.
Over-Cleaning the EarsA healthy dog's ear has a self-cleaning mechanism. A small amount of light brown wax is normal and protective. Cleaning a healthy, non-problematic ear too frequently (say, every day or even every week without cause) strips away these natural, protective oils. This creates a dry, irritated environment that is more susceptible to infection. It's like overwashing your hands until they become cracked.
Being Too Rough or Improperly Restraining Your DogEar cleaning should be a calm, positive experience. If you are frustrated or in a hurry, and your dog is squirming, you're more likely to jab the bottle tip too far into the canal or handle the ear roughly. This can cause physical injury and create a lasting negative association. For anxious pups, using calming treats from your dog food delivery routine *before* starting can help set the stage for a smoother process. If your dog is severely stressed, our dog anxiety guide has tips that can help with handling.
So, When *Should* You Clean Your Dog's Ears Safely?
Safe, preventive ear cleaning has its place in a responsible grooming routine. The key is to do it only when necessary and to do it correctly.
As a Routine, Vet-Recommended MaintenanceFor dogs prone to ear issues (like those with allergies, floppy ears, or who love swimming), your veterinarian may recommend a specific schedule, such as once a week or after every swim. The goal here is to manage moisture and prevent the conditions infections love. Never start a routine schedule without discussing your individual dog's needs with your vet first.
When There's Visible, Superficial Dirt or Light WaxAfter a particularly dusty hike or a roll in the grass, you might see some loose dirt or a small accumulation of soft, pale wax at the opening of the ear canal. This is a good time for a gentle clean to remove what the ear's natural migration hasn't handled yet.
When Directed by Your VeterinarianIf your dog has been treated for an ear infection, your vet will often instruct you to clean the ears *before* applying prescription medication. This is a critical step to remove discharge and debris so the medicine can contact the skin directly. In this case, you are cleaning under specific medical instruction, often with a vet-prescribed cleaner.
How to Clean Safely: A Step-by-Step Guide
When you have determined it is safe and appropriate to clean, follow this approved by veterinarians method.
1. Gather Supplies: A veterinarian-recommended ear cleaning solution, cotton balls or gauze squares (never swabs), and plenty of tasty, high-value treats.
2. Position Your Dog: Do this in a well-lit, calm area. Have your dog sit or stand comfortably. You may need a helper to offer treats and gentle restraint.
3. Apply the Solution: Hold the ear flap upright to straighten the canal. Fill the ear canal with the cleaner until it is almost overflowing. Do not insert the bottle tip deep into the canal.
4. Massage: Gently massage the base of the ear for 20-30 seconds. You'll hear a squishing sound. This helps the solution break up debris.
5. Wipe and Let Shake: Use a cotton ball to gently wipe out the loosened debris from the part of the ear canal you can easily see. Then, let your dog shake their head. This brings deeper debris up to the surface.
6. Final Wipe: Use a fresh cotton ball to wipe the ear flap and the visible part of the canal one more time until it looks clean. Always reward your dog generously.
Final Thoughts
Caring for your dog means knowing when to act and when to seek expert help. Ear care is a perfect example of this balance. While keeping your dog's ears clean is part of good grooming, it's not always the right first step. The instinct to clean something that smells or looks dirty is strong, but in the case of a dog's delicate ears, that instinct can lead to more pain and complications.
Your most powerful tools are observation and partnership with your vet. Regularly check your dog's ears for normal, healthy appearance. Smell them when they're healthy so you know what's normal. If anything changes, odor, discharge, redness, or scratching, your next step isn't to the cleaning shelf. It's to the phone to call your veterinarian. By avoiding harsh products, skipping the cotton swabs, and resisting the urge to clean a potentially infected ear, you protect your dog from inadvertent harm. It's a shift from reactive cleaning to informed, preventive care, ensuring those ears stay healthy for all the happy head tilts and perked-up listening to come.
Find the Perfect Box for Your Dog
Compare top-rated dog subscription boxes and find the best fit for your pup.
Compare Boxes