2026 Dog Tick Removal Safe Guide

Learn the safe, effective method for removing ticks from your dog in 2026.
The safest way to remove a tick from your dog is by using fine tipped tweezers or a specialized tick removal tool. Grasp the tick as close to your dog's skin as possible, then pull upward with a slow, steady motion without twisting or jerking. After removal, disinfect the bite area and wash your hands thoroughly.
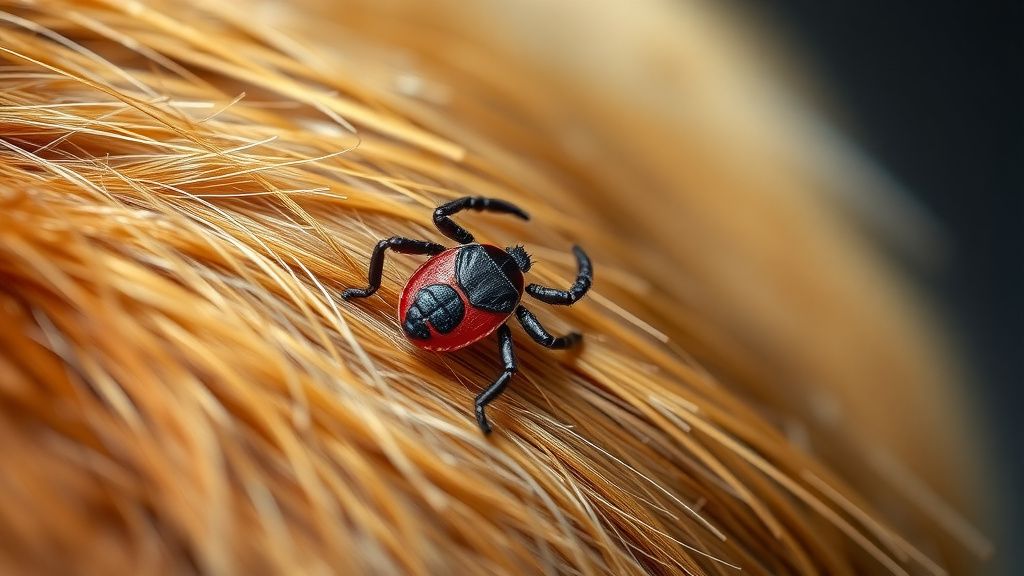
Finding a tiny, blood filled parasite latched onto your dog's skin is a moment of pure dread for any pet owner. That quick flash of panic is completely normal. Ticks are more than just creepy crawlies; they are arachnid ectoparasites that feed on blood and can transmit serious bacterial, viral, and protozoal diseases. The threat is real, especially as temperatures climb above 40 degrees Fahrenheit, with peak activity in spring and fall. But here's the good news: with the right knowledge and a calm approach, you can safely and effectively handle this situation at home. This guide will walk you through every step, from the essential tools you need to the critical aftercare, ensuring you're prepared to protect your furry friend's health. Let's turn that worry into confident action.
What You Need Before You Start: The Right Tools
Trying to remove a tick with your fingers or the wrong instrument is a recipe for trouble. Squeezing the tick's body can force infected fluids back into your dog, and you risk leaving the mouthparts embedded. Gathering a simple kit beforehand makes the whole process smoother and safer for both of you.
Your tick removal toolkit should include:
* A Tick Removal Tool or Fine Tipped Tweezers: This is non-negotiable. A specialized tick removal tool, often shaped like a little fork or hook, is designed to slide under the tick without squeezing it. The next best option is a pair of fine tipped or blunt end tweezers. The goal is to get a grip *close to the skin*, on the tick's mouthparts, not its engorged body.
* Rubbing Alcohol or a Pet Safe Antiseptic Cleanser: You'll use this to disinfect the bite area on your dog after removal. It's also smart to disinfect the tips of your tweezers or tool before you start.
* A Small Container with a Lid: A jar, pill bottle, or even a sealed plastic bag is useful. After removal, you may want to save the tick for identification, especially if your dog shows any unusual symptoms later.
* Treats and a Helper (Optional but Helpful): Have some of your dog's best dog treats ready to reward calm behavior. An extra pair of hands to gently hold and soothe your dog can be invaluable, particularly if the tick is in a sensitive spot.
Think of this kit as part of your pet first aid supplies. Storing it with your other essentials means you're always ready.
The Safe, Step by Step Tick Removal Process
Now that you're prepared, take a deep breath. Rushing is the enemy of proper tick removal. Find a well lit area, get your dog comfortable, and follow these steps meticulously.
Step 1: Part the Fur and Expose the Tick
Gently spread your dog's fur around the tick to get a clear view of where it's attached. You need to see the point where the tick's head meets your dog's skin. If the fur is too thick, you can carefully trim a little around it with blunt scissors.
Step 2: Grasp the Tick Firmly and Close to the Skin
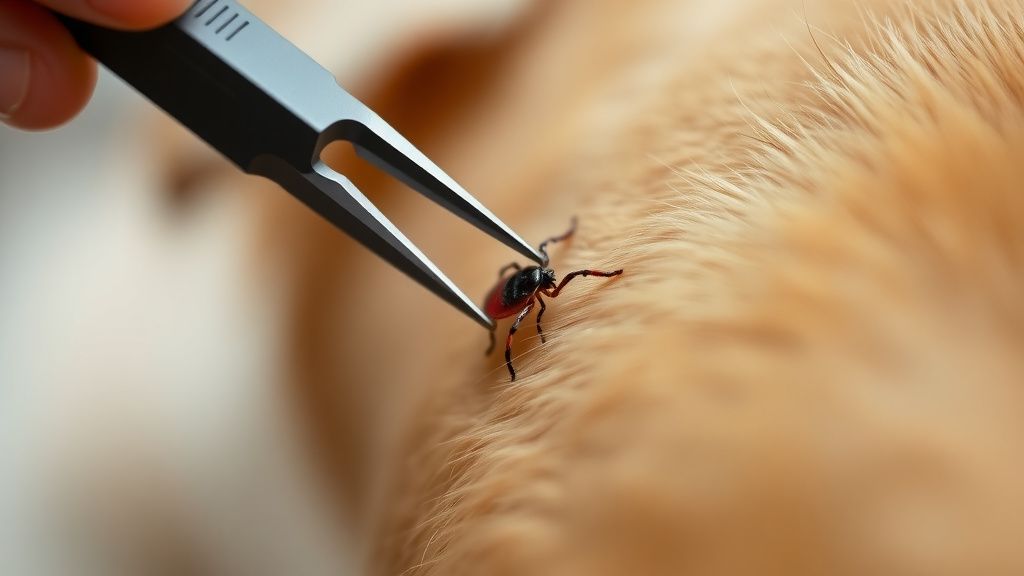
Using your tick removal tool or fine tipped tweezers, grasp the tick as close to your dog's skin surface as possible. If using tweezers, grip the tick's mouthparts, not its body. A firm, precise hold here is crucial.
Step 3: Pull Upward with Steady, Even Pressure
This is the most critical step. Pull straight upward in a slow, steady motion. Do not twist, jerk, or yank. Twisting can cause the mouthparts to break off and remain in the skin. Imagine you are pulling a splinter straight out. The goal is to remove the entire tick, head and all, in one piece.
Step 4: Contain and Clean Up
Once the tick is out, place it in your sealed container. You can add a bit of rubbing alcohol to kill it. Next, thoroughly clean the bite site on your dog with your antiseptic cleanser or rubbing alcohol. Also, wash your own hands with soap and water. Disinfect your tweezers or tool as well.
Step 5: Inspect and Monitor
Examine the tick to see if it's intact. Look at the bite area on your dog. If you see any dark spots or what looks like the tick's head still embedded, do not dig into the skin. This can cause infection. Contact your veterinarian for assistance in removing any remaining parts.
What to Do After Removing the Tick
The tick is gone, but your job isn't quite finished. Post removal care and vigilance are key to preventing complications.
First, don't panic if you see a small, red bump on your dog's skin for a day or two. This is a typical local reaction to the bite. However, you need to monitor this area and your dog's overall health closely in the weeks that follow.
Be on the lookout for these symptoms that could indicate a tick borne illness:
* A bullseye shaped rash or a red area that expands around the bite site
* Lethargy or reluctance to move
* Loss of appetite
* Fever
* Swollen joints or lameness
* Swollen lymph nodes
I've seen cases where a dog seemed fine for a week, then suddenly became lethargic and stiff. It turned out to be Lyme disease. If you notice any of these signs, contact your veterinarian immediately and inform them about the tick bite. Having the saved tick can help your vet identify potential diseases common in your area.
Speaking of saving the tick, it's a good practice to note the date of removal on the container. If you're concerned, you can ask your vet about sending the tick to a lab for disease testing.
How to Prevent Ticks from Getting on Your Dog
An ounce of prevention is truly worth a pound of cure for ticks. Relying solely on removal after the fact leaves your dog vulnerable. A strong, multi layered prevention strategy is the best way to keep your companion safe.
* Use Veterinarian Recommended Preventatives: This is your first line of defense. Talk to your vet about the most effective topical treatments, oral medications, or tick collars for your region and your dog's lifestyle. These products kill ticks on contact or after they bite, often before they can transmit disease.
* Perform Daily Tick Checks: Make this a habit after every walk, hike, or play session in grassy or wooded areas. Run your hands over your dog's entire body, feeling for small bumps. Pay special attention to warm, hidden areas ticks love: inside the ears, around the eyelids, under the collar, between the toes, in the armpits, and around the tail.
* Maintain Your Yard: Keep your grass mowed short and clear away brush, leaf litter, and tall weeds where ticks thrive. Creating a clean, sunny barrier between wooded areas and your lawn can reduce tick populations.
* Consider the Lyme Disease Vaccine: For dogs in high risk areas, discuss the Lyme disease vaccine with your veterinarian. The CDC notes that except for Lyme disease in dogs, pets cannot be vaccinated against other tickborne diseases, making preventive measures even more critical.
* Groom Regularly: Regular brushing and bathing help you spot ticks early. Some dog owners find that keeping their pup on a consistent grooming schedule, supported by a dog subscription box that delivers shampoos and brushes, helps them stay on top of their pet's coat health.
Remember, these pests are persistent. Combining these methods gives your dog the best possible protection.
Common Tick Removal Mistakes to Avoid
In the stress of the moment, it's easy to fall back on old wives' tales or hurried techniques. Steer clear of these common errors that can do more harm than good.
* Do NOT use your fingers. This increases the risk of squeezing the tick and exposing yourself to pathogens.
* Do NOT twist or jerk the tick. As emphasized by multiple veterinary sources, this almost guarantees leaving mouthparts behind.
* Avoid "suffocating" methods. Do not cover the tick with Vaseline, nail polish, or alcohol in an attempt to make it detach. These methods can irritate the tick, causing it to regurgitate saliva into the wound, which heightens the risk of disease transmission.
* Do not apply heat. Using a match or hot needle is dangerous and can severely burn your dog.
* Don't ignore the aftermath. Failing to disinfect the area or monitor for symptoms puts your dog at risk for secondary infection or undiagnosed illness.
Sticking to the simple, steady, upward pull with the right tool is the only method backed by veterinary experts and organizations like the AKC and Red Cross.
Final Thoughts
Discovering a tick on your dog is a test of any pet owner's composure, but it doesn't have to be a crisis. Armed with a simple tool, the step by step knowledge of a slow, steady pull, and a commitment to aftercare, you are more than capable of handling it safely. The real victory lies in consistent prevention through vet partnered products, daily checks, and maintaining a clean environment. This proactive approach lets you and your dog enjoy outdoor adventures with far less worry. Keep your tick kit stocked, stay observant of your dog's health, and never hesitate to call your veterinarian with questions. Your attentive care is your dog's strongest shield against these tiny but formidable foes.
Recommended Products


Find the Perfect Box for Your Dog
Compare top-rated dog subscription boxes and find the best fit for your pup.
Compare Boxes